
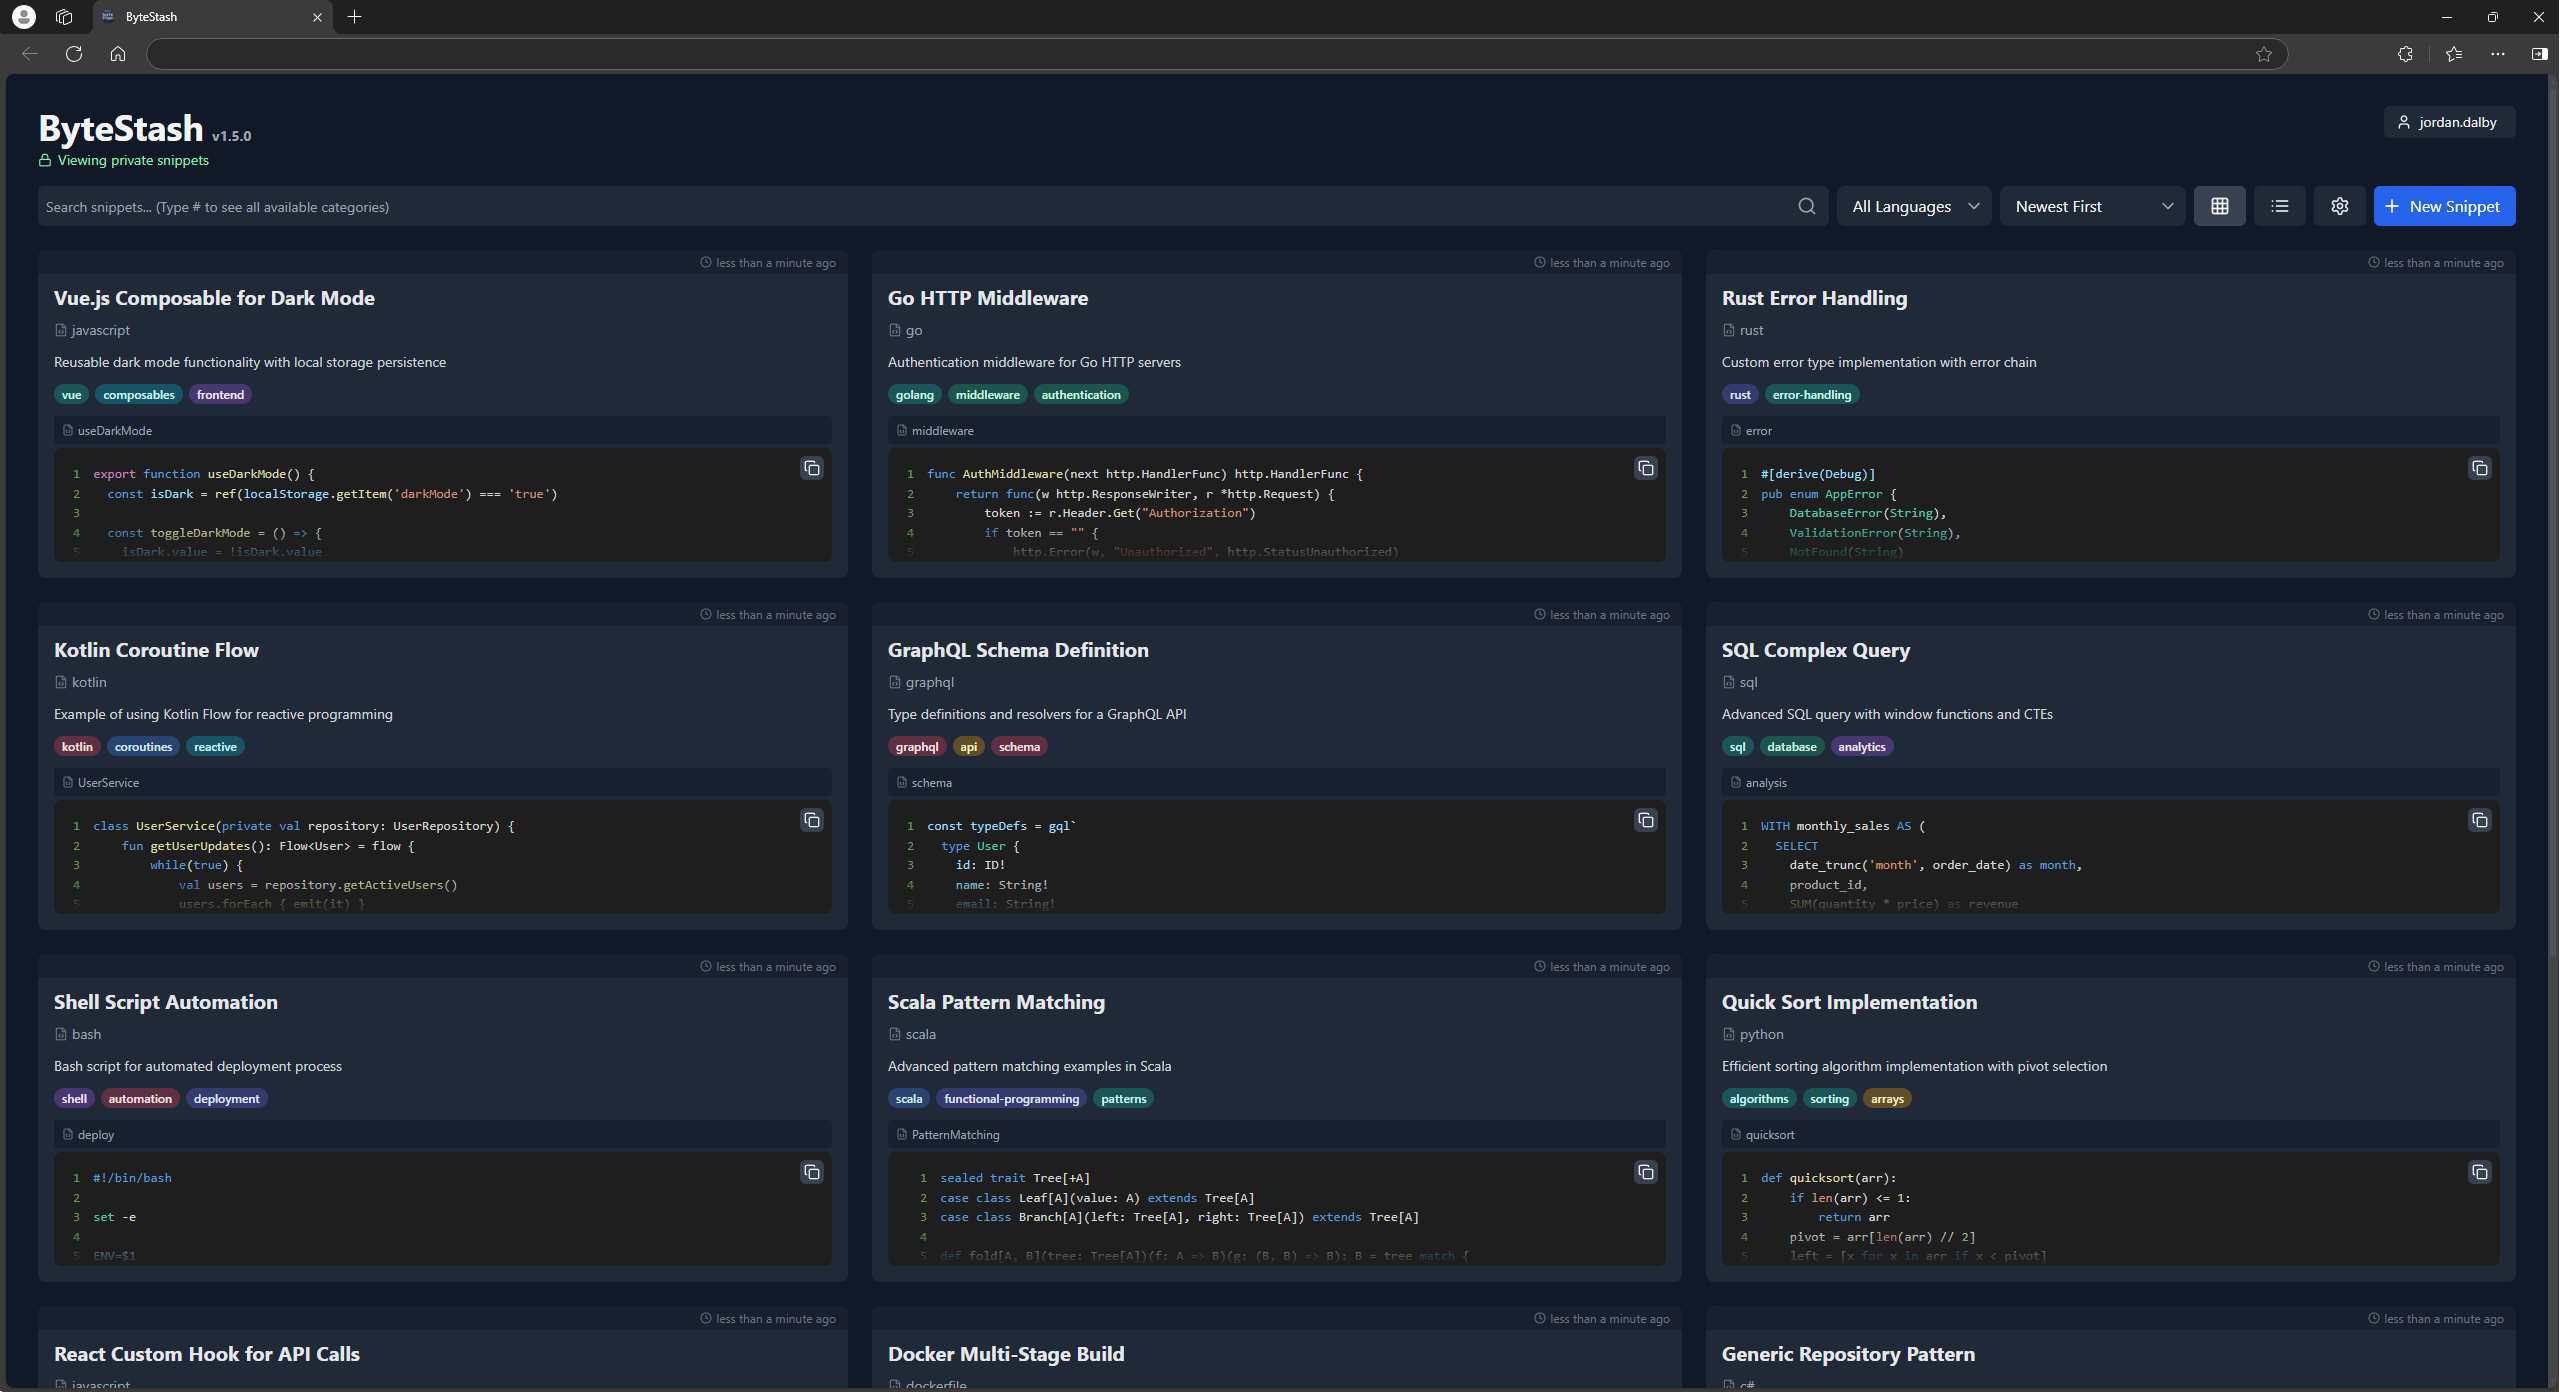
ByteStash is a self-hosted web application designed to store, organise, and manage your code snippets efficiently. With support for creating, editing, and filtering snippets, ByteStash helps you keep track of your code in one secure place.
Check out the ByteStash demo powered by PikaPods!
Username: demo
Password: demodemo
- Create and Edit Snippets: Easily add new code snippets or update existing ones with an intuitive interface.
- Filter by Language and Content: Quickly find the right snippet by filtering based on programming language or keywords in the content.
- Secure Storage: All snippets are securely stored in a sqlite database (or optionally PostgreSQL), ensuring your code remains safe and accessible only to you.
- AI Integration (MCP): Connect AI assistants such as Claude, OpenAI and Perplexity through a built-in Model Context Protocol endpoint to search and manage your snippets, authenticated with your existing API key. See MCP (AI assistants).
ByteStash is now on the Unraid App Store! Install it from there.
Also available on PikaPods for 1-click install from $1/month.
ByteStash can also be hosted manually via the docker-compose file:
services:
  bytestash:
    image: "ghcr.io/jordan-dalby/bytestash:latest"
    restart: always
    volumes:
      - /your/snippet/path:/data/snippets
    ports:
      - "5000:5000"
    environment:
      # See https://github.com/jordan-dalby/ByteStash/wiki/FAQ#environment-variables
      #ALLOWED_HOSTS: localhost,my.domain.com,my.domain.net
      BASE_PATH: ""
      TOKEN_EXPIRY: 24h
      ALLOW_NEW_ACCOUNTS: "true"
      DEBUG: "true"
      DISABLE_ACCOUNTS: "false"
      DISABLE_INTERNAL_ACCOUNTS: "false"

      # See https://github.com/jordan-dalby/ByteStash/wiki/Single-Sign%E2%80%90on-Setup for more info
      OIDC_ENABLED: "false"
      OIDC_DISPLAY_NAME: ""
      OIDC_ISSUER_URL: ""
      OIDC_CLIENT_ID: ""
      OIDC_CLIENT_SECRET: ""
OIDC_SCOPES: ""ByteStash stores everything in a SQLite database under /data/snippets by default. To use
PostgreSQL instead, point ByteStash at an existing database with either a connection string or
the individual settings. The tables are created automatically on first start.
    environment:
      DATABASE_URL: "postgres://bytestash:password@postgres:5432/bytestash"
      # or
      POSTGRES_HOST: postgres
      POSTGRES_PORT: "5432"
      POSTGRES_USER: bytestash
      POSTGRES_PASSWORD: password
POSTGRES_DB: bytestash| Variable | Description |
|---|---|
DATABASE_URL / DATABASE_URL_FILE |
PostgreSQL connection string, or a file containing it (Docker secrets). |
POSTGRES_HOST, POSTGRES_PORT, POSTGRES_USER, POSTGRES_PASSWORD, POSTGRES_DB |
Used when DATABASE_URL is not set. Port defaults to 5432, user and database to bytestash. POSTGRES_PASSWORD_FILE is also supported. |
POSTGRES_SSL |
true to require TLS, no-verify to skip certificate verification, false to disable. |
MIGRATE_SQLITE_TO_POSTGRES |
true copies the existing SQLite data into PostgreSQL on startup. Only runs while PostgreSQL is empty, so it is safe to leave enabled. |
If neither DATABASE_URL nor POSTGRES_HOST is set, ByteStash keeps using SQLite. Keep the
/data/snippets volume mounted either way: it holds the generated JWT secret (unless
JWT_SECRET is set) and the SQLite file used by the migration.
- Take a backup of your
/data/snippetsvolume. - Add the PostgreSQL settings above together with
MIGRATE_SQLITE_TO_POSTGRES: "true"and restart the container. Users, snippets, shares, API keys and settings are copied across with their existing IDs, so share links and API keys keep working.
The migration can also be run by hand once PostgreSQL is configured:
docker compose exec bytestash node src/scripts/migrateToPostgres.js
# replace whatever is already in PostgreSQL with the SQLite data
docker compose exec bytestash node src/scripts/migrateToPostgres.js --force
Changes made while running on PostgreSQL are not copied back to SQLite.
- Frontend: React, Tailwind CSS
- Backend: Node.js, Express
- Database: SQLite (default) or PostgreSQL
- Containerisation: Docker
Once the server is running you can explore the API via Swagger UI. Open
/api-docs in your browser to view the documentation for all endpoints.
ByteStash exposes a remote Model Context Protocol endpoint so AI assistants such as Claude (desktop & web), OpenAI/ChatGPT and Perplexity can search, read and manage your snippets directly.
- Endpoint:
https://<your-host>/mcp(orhttps://<your-host><BASE_PATH>/mcpwhen a base path is configured). It is served on the same host/port as the app, so nothing extra needs to be exposed in your deployment. - Transport: Streamable HTTP.
- Auth: the same API key used by the REST API. Create one under
Settings → API Keys in the UI, then send it as
Authorization: Bearer <api-key>(or thex-api-keyheader). The MCP tools only ever access snippets owned by that key.
list_snippets, get_snippet, create_snippet, update_snippet, delete_snippet,
list_metadata.
- Claude Desktop (
claude_desktop_config.json):{ "mcpServers": { "bytestash": { "type": "http", "url": "https://your-host/mcp", "headers": { "Authorization": "Bearer YOUR_API_KEY" } } } } - Claude.ai / web & other custom connectors: add a custom connector pointing at
https://your-host/mcpand supply theAuthorization: Bearer YOUR_API_KEYheader. - OpenAI Responses API: pass it as an MCP tool:
{ "type": "mcp", "server_label": "bytestash", "server_url": "https://your-host/mcp", "headers": { "Authorization": "Bearer YOUR_API_KEY" } } - Perplexity: add a remote MCP connector with the URL above and the same
Authorizationheader.
The endpoint requires HTTPS for remote clients — terminate TLS at your reverse proxy/ingress as you already do for the web UI.
Contributions are welcome! Please submit a pull request or open an issue for any improvements or bug fixes.
To add phrases for a new language, follow these steps. Example for fr locale:
- Add the locale name to the
Localeenum in theclient/src/i18n/types.tsfile - Add the locale name to the
localesarray in theclient/i18next.config.tsfile - Run translation synchronization:
cd client && npm run i18n:extract - Replace all
__TRANSLATE_ME__lines with the desired phrases - Create new resources file as
client/src/i18n/resources/fr.ts - Update export resources in file
client/src/i18n/resources/index.ts - Run the server in development mode:
npm run dev - Run the client in development mode:
cd client && npm run start